banner
Showing posts with label red lipstick. Show all posts

Saturday, May 24, 2014

Vintage Gal On A Budget

Hello, darlings!

In today's rough economic times, we are all trying to look for the best buy for our money. We are often not able to splurge on the comforts we were once able to. Makeup is no exception. 

In order to compete with their high-end counterparts at Sephora and department store beauty counters, and to appeal to the value-conscious consumer, drugstore beauty brands like Rimmel London and Maybelline New York are rolling out their own lines of primers, liners, setting powders, long wear lipsticks and other items only previously available in more affluent locations.

Do they pass the test? Read on to find out!


Rimmel London Fix & Perfect Pro Primer in Shade 002


Rating: 4 stars (out of a possible 5)

Cost: $7.29 (at Rite Aid)

--

This spring, Rimmel London introduced a new line of primers and foundations that promise a smooth, matte finish. The foundation line, called Stay Matte, ties into their face primer line, called Fix & Perfect.

The product promises 5-in-1 results, claiming to smooth, resurface, brighten, mattify, and protect.

The primer itself is of a creamy, white consistency, and has a smell similar to Pond's Cold Cream, which is a light, nearly floral scent.  It glides on beautifully and evenly with very little effort.


Freshly applied.


Several hours later.


It's stayed on flawlessly since 11am (it's now 1:30am), and does everything it promises, with one small exception. I noticed no difference in the brightness of my complexion. But it did provide a smooth surface for my foundation, filled in pores, and kept my quite oily face free of shine for the better part of the day.

As for protection, the true test of that will come this summer!

--


Rimmel London Exaggerate Full Color Lip Liner in Shade 024: Red Diva


Rating: 3 stars

Cost: $6.49 (at Rite Aid)

--

This lipliner is offered as part of the Exaggerate line.  One pro I found is that it is a twist up pen, thus, no sharpening involved. The product itself is slanted, dispensed from an also slanted opening. 

Red Diva is a rich, warm red shade with good color payoff.

In the picture from the face primer review, I'm wearing it with Revlon's "Love That Red" over the top, but here it is swatched:


When I first tried to apply it, I twisted it up a fair amount - not too high - in order to both line and fill in my lips before lipstick.  To my surprise, it kept breaking! I wasn't pressing especially hard, in fact, I'd say I was using a light hand. 

I consulted Makeup Alley and similar for reviews, to see if others encountered the breakage issue, and they did.  In later uses, I found you have to twist it up only by the littlest bit, and apply gently. 

In all seriousness ladies, go low and slow with this one, otherwise you'll end up with a red streaked mess all over your bathroom sink. 

Another thing about it I found irksome is the amount of product in the tube. The packaging says it contains 0.25 grams. As stated earlier, I like to line and fill in my lips before applying lipcolor. With that usage, I've gone through the tube in a week and a half.

This liner also has an off-putting chemical smell. It might not bother some, but I found it most unpleasant. 

In closing, Rimmel, please, work on strengthening the formula on this product, and perhaps include more of it. And maybe give it some sort of unobtrusive scent, or none at all?

--


Rimmel London Exaggerate Undercover Shadow Primer


Rating: 1 star

Cost: $3.99 (at Rite Aid)

--

Oh dear, oh my...

This product is also a part of Rimmel's Exaggerate line, and it claims to brighten eyeshadow, maximize wear, and even make it waterproof. 

Well, these claims are all washed up. 

I didn't mind the doe foot applicator, but what did bother me was the chunky glob of product dispensed on the end of the wand. 


In my opinion, the way the product dispenses will have you wasting a decent amount of it over time. 

I also didn't mind the white color, and when first applied to the skin has a pearly sheen, which could be pretty if it didn't disappear entirely after working with it to smooth it on. 


Product first applied onto skin. 


The feel of this primer is very thin and greasy.  To be fair, I'm used to the consistency of Too Faced Shadow Insurance, which is a  far thicker, flesh toned cream. 

To apply, I dabbed it on my eyelid, then used my fingertip to smooth. The silicone base of this primer caused it to slip and slide on my skin, and seemed wet to the touch. I didn't feel too confident about its staying power by this alone.

As I said earlier, the pearly sheen disappears in minutes after application. I also found the finish to look somewhat chalky on my very pale complexion. 

The packaging recommends you let the primer dry after application, and I did just that.

Then, the real trouble began. 

I have somewhat oily eyelids, and this product already began to crease before putting on any shadow! I had to work quickly to re-smooth.

Eyeshadow applied on top of this actually reduces the color payoff of the shadow, regardless if it's high end, low end, or in between.  I had to pack on the color with my brush in order to get it to show up at all. After that, I noticed that some of the primer and shadow had crumbled into little balls on the sides of my eyelids.  

Afterward, I went about the business of part of my day. I checked on my makeup in about an hour and a half to two hours, and my shadow was completely creased.  The dregs of my Too Faced Shadow Insurance, or a thin layer of Kat Von D concealer hold eyeshadow on longer by comparison. 

In short, if you have oily eyelids or do not like the consistency of silicone based primers, stay far away from this one. Perhaps those without oily eyelids have better luck. 

I have since purchased a different product -  Revlon's PhotoReady Eye Primer and Brightener. Hopefully that will yield a better result. 

--


Maybelline New York Super Stay 24 Color in Shade 025: Keep Up The Flame


Rating: 1 star

Cost: $9.99 (at CVS)

--

As I have mentioned, my wedding is coming up in November.  Over the past few weeks, I have been trying to find a reasonably priced, long wearing red lipstick for the occasion.  I saw this lipstick mentioned on Tumblr and decided to give it a try. 

However, it gets the kiss off!

This lipstick boasts up to 24-hour wear, and removal with an oil-based makeup remover, and both of these claims fell flat. 

I was initially not impressed by their selection of reds. Keep Up The Flame is the only one without any sort of glitter-like shimmer or sheen to it.  


My style stays true to mid-century vintage, and while there was sheen in lip color then, it was not at all glittery.

I found out later that there was a shade of this product called Everlasting Ruby, which would have been more my speed, but it has been unfortunately discontinued. 

The tube has two ends: one for the liquid color (left), and the other, a clear balm which seals that color once dried (right).

The applicator for the lipstick is a doe foot, and again, it dispenses a massive glob of product right on the end.  I actually wiped some off of the wand a bit in order to prevent clown mouth.


In further research, reviewers advised to let the color portion of the product dry for a couple minutes before applying the clear balm on the other end.  I applied the lipstick on my lips, including the corners. As it dried, it started to feel very gummy and sticky, especially in the corners. I didn't much care for that, but thought the clear balm might help. It did, but by a minuscule amount.

After the balm was applied, I noticed that some of the lipstick came away with it, like so:


Let it be said  that the color payoff is very pigmented and rich, that is, if you don't eat anything. 

I decided to give this lipcolor a true test - eating a hot dog with just a bit of mustard.  Post meal, there was no sign of it marking my chin as some lipsticks tend to do, but what remained was quite awful. 

The corners had bled and feathered onto my skin, and most of the product had worn off the center of my lips completely, leaving a silly looking red line at the perimeter of my lips. Where the product remained was chunky, or had pilled off into little balls. Yuck!

This is another where you don't get much bang for your buck as far as amount of product for price is concerned. For $10, this is the amount of lipstick in the tube:


So, back to the drawing board! I may eventually splurge and get Lime Crime Velvetines in Red Velvet (which is currently out of stock and has been for a couple of months) or find a decently priced lip stain that is comparable, as the Velvetines are rather expensive, priced at $20, minus shipping. 

--

This next product is a break from the drugstore hit parade, and is technically high end, but I've found a way to keep it affordable!


Estée Lauder Sumptuous Bold Volume Lifting Mascara in Shade 01: Black


Rating: 5 stars

Cost: $7.97 (minus shipping)  for a pack of three travel sized tubes, Amazon.com


--

This mascara is cream of the crop! I love mascaras that give rich pigment and do what they promise, and Estee Lauder delivers on both!

I received this mascara a while ago in travel size as part of a set with a full sized shimmer lipstick at Christmastime, when the perfume counters give all kinds of little goodies of that sort along with the fragrances.

It has a standard multi-fibered wand (not one of those poky ball applicators as seen in recent years).

The color is a rich black that dries quickly and doesn't smear. It provides gorgeous definition of the lashes with minimal to no clumping, and does volumize. 


(Please excuse my eyebrows, teehee!)


In researching on Google, I wasn't able to find any trace of it on any American websites, other than Amazon for the price and size listed above.  This is where your most cost effective means end. Amazon also sells a full size tube for $18-$21 (minus shipping),  Estee Lauder's UK website sells it for £20.50 for 6 milliliters and £34.17 for 10 milliliters. (That's $34.50 for 6 milliliters, and $57.51 for 10 milliliters, respectively.) Nordstrom also carries it full size for $24. In keeping with a budget, I fully recommend getting the travel sizes. To me, the longevity and payoff is the same. 


--


I truly hope this helped some of you cost-minded lovelies out there! It's tough to find a product for a low price that works well, and makeup is definitely in the "you get what you pay for" category!

Next post, I shall continue the popular "A Lady's Charm" series! The third installment will cover mid-century dating and general etiquette, versus that of today!


Until next time, 


Tuesday, March 11, 2014

A Lady's Charm - Part Two: Cosmetics

Hello, darlings!

On this next installment of A Lady's Charm, we discuss cosmetics, the fashionable woman's paint set. 

These, just like perfume, can evoke a mood or feeling, with just a flick of a brush or pencil!

It is imperative to choose a look that flatters one's features.  And the signature beauty of the 1940s and 50s - winged dark liner, neutral shadow, and a red lip - provides just that distinction!

--


(The always glamorous Rita Hayworth - circa 1940s)

--

Skincare


Of chief importance, and any good makeup artist will tell you this, is to take care of your skin.  Your eyes, lips, and cheeks could be on point, but it's the canvas on which those elements are placed that makes the look. 

Washing with a gentle cleanser, toning, and moisturizing is a good regimen to keep. Only exfoliate 1-2 times a week, sticking closer to one time if your skin is sensitive (like mine). 

As I mentioned in a previous comment on a post, I swear by Pond's Cold Cream.  If that doesn't work for you, find something that does.  Use whatever makes your skin feel healthy and rejuvenated.

Another useful tip - and we've all been guilty of it a time or two - but never sleep in makeup! The oils and dirt from the day are left clinging and it wreaks havoc on the complexion! And always, always keep your makeup brushes clean. 

When you hit a time when your face is feeling less than fancy, drinking water or green tea will help flush out impurities.


Foundation and Concealer


As with all makeup and preparation for it, start with a good base. Priming the skin is just as important as taking care of it. For a vintage look, a matte, flawless complexion is ideal. Smashbox Cosmetics' Photo Finish is a good recommendation to achieve this, but, as always, use what you like and are comfortable with. 

When applying foundation, do so in as much natural light as possible, to avoid over-application. And blend well! Especially at your hairline, under your jaw, and near your ears. Moving your foundation brush in a sweeping circular pattern helps this.

Concealer is lightly applied to disguise any lumps, bumps, or discolorations, and should be slightly lighter than or match your skin tone.  Use a concealer brush or your finger to apply.

Set both with a translucent or finishing powder. 


Contouring, Highlighting, and Blush


Correct color and application is vital when applying your contour powder. It is applied below the apple of the cheek,  either side of the nose, on either temple, and in the dip of your chin. Choose a shade that's about two times darker than your natural skin tone, and use an angled brush that's slightly fluffy to apply, holding it near the edge of the handle. The closer you hold the brush to the ferrule, the harsher your line and shading will be.  If you're going for a more 1980s look, that works, but not for anything mid-century. 

Be sure to tap any extra powder off the brush before applying! The same goes for eyeshadow which will be covered later.

Highlighter is applied to the middle of the forehead, bridge of the nose, top of the cheekbones, and at the top of the Cupid's bow, all in light increments. You can buy a product specifically made for highlighting, like Benefit's High-Beam, or you can use a matte white or pearly toned eyeshadow to achieve the same effect. Just be careful not to use one that's too shimmery or glittery, as it will make the face appear shiny. 

Blush ties the contouring and highlighting together seamlessly.  Rosy or peach tones were popular in the 1940s and 50s. Both are equally  flattering.  This is applied by lightly pressing the powder to the apple of the cheek, and blending backwards toward the ear with a large, fluffy brush.

Always apply your contouring shade and blush in small increments as well. It is easier to add than take away. If you do overdo it a bit, sweep on a bit of the powder you use to set your skin to lighten to your desired effect.


Eyebrows


Your eyebrows should be well groomed and filled in using an eyeshadow, brow kit or pencil.  Use a shade that matches your hair color, or if your hair is dyed, blend appropriate colors so everything matches.

Using a small brow brush or the little brush that most eyebrow pencils and kits have, brush your eyebrow hairs up and outwards for a smooth line, and keep your pencil sharp for truest color and definition of the arch and end point. Use small strokes to simulate the shape of hairs.

To groom, gently tweeze or wax stray hairs as needed, or seek an esthetician's help if you wish.


Eyeshadow, Liner, and Mascara


Because the lips are going to be so bold, neutral shades on the eyes are needed so as not to compete. 

Before you apply any color, prepare your lids for it using a primer. I prefer Too Faced Shadow Insurance, but you can use any brand that you like.

For your main color, use a shade that is in the same color family as your skin tone, but not an exact match.  For a true mid-century look, this shade, and the others you'll use, are kept matte.

Once your base shade is applied, take a medium to saddle brown color, and starting at the outer third of the lid, blend inwards and in the crease to define your eye shape.  As in previous steps, blend well for a softened look.

Sweep a pearl or cream shadow on your brow bone to highlight, and clean up any fallout from your shadows with a clean brush.

Now comes the tricky part. Eyeliner.

Using a black liquid liner with its applicator or gel liner with a tiny brush, and using slow strokes, follow the shape of your eye, building the line thicker as you reach the outer edge. 

There are many tricks for keeping your hand steady as you do this - holding your elbow on the table and looking into a hand mirror is a common one.  Again, find whatever works for you and stick with it. 

For the wing, carefully draw a line from the corner of your eye that stops just before the end of your eyebrow, and mirror that line on the top lash line, connecting the two in a point, and fill in. 

If you have difficulty making the point, I recently found a YouTube tutorial video by Cherry Dollface to be of help. She uses a piece of Scotch tape placed where the wing is supposed to go to help keep lines sharp.

Going slowly ensures a smoother line and less likelihood for mistakes. Also, be sure the line doesn't go too thickly, or curl up at the end. You want your line and wings to be straight on (per the shape of your eye)  from all angles.

Once the liner dries completely, curl your upper lashes and coat them and the lower ones with mascara. 1-2 coats is usually sufficient.  Try to make your lashes fan out at the ends when you curl them, as that hint of flirtation was also popular in mid-century makeup. If you can't achieve that naturally, a plume of thin false lashes applied to the outer corner of your upper lash line will do the trick (Lucille Ball did this quite often to add drama to her own eye look!) 


Lips


Last, but not least!

Applying red lipstick is considered an art by many, as you can change your lip shape to your heart's content with the combination of lipliner and a brush.

Make sure your lips are moisturized but not wet, because the liner will not hold. Using a sharp red lip liner, either matching your lipstick shade or slightly darker or lighter, outline and fill in your lips.  If you wish, you can go slightly outside your natural lip line to make them appear fuller.

Next, apply a light coat of translucent powder all over your mouth using your finger or a brush. This will ensure your color lasts all day.

Open your desired shade of lipstick and coat both sides of a lip brush with the pigment, and apply, keeping your lines as clean as possible.  And don't forget the inner corners!

Blot with a tissue, and apply a second coat with the lip brush. Once that is complete, take a clean, small eyeshadow brush and sweep your face powder around the perimeter of your mouth to lock in the color and prevent bleeding. 

--


Additional Resources

Consult these wonderful advice pages on Leah Loverich's blog for this look and variants on it, and other helpful vintage styling tips.  

YouTube is another great source for vintage makeup and styling help. Cherry Dollface and LisaFreemontStreet are a wealth of information.


Until next time, 


Saturday, February 22, 2014

Outfit of the Day: The Girl Can't Help It!


Hello, darlings!

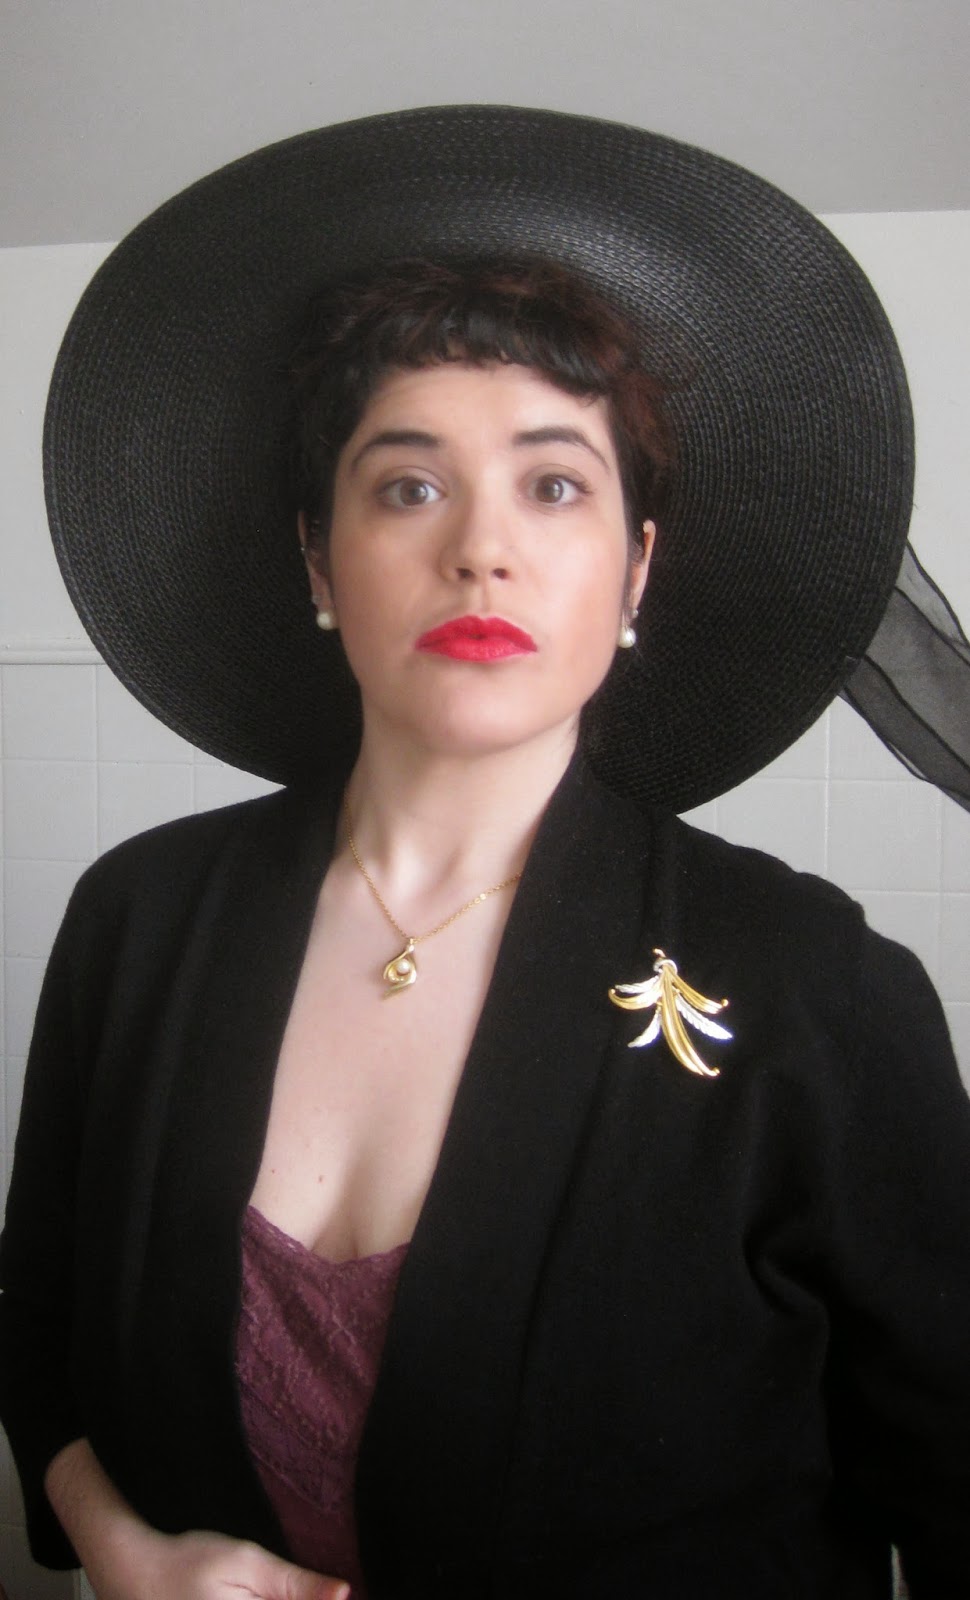
Long time no see! Life has been a little crazy, but now I'm back, and channeling my inner Jayne Mansfield today.

The purple lace dress is from American Eagle Outfitters, the black sweater over is from Burlington Coat Factory (no idea of the actual maker as I cut out the tag - it was quite itchy!)

Earrings are American Eagle as well, the pearl drop necklace and brooch are vintage. 

The hat is from Burlington Coat Factory as well, and it is huge!

I wore Fire and Ice on my lips again today as the weather has warmed some, and bright colors mean more warmth can't be far behind!


Until next time,


Saturday, February 15, 2014

Outfit of the Day: Hey, Sweetheart!


Hello, darlings!

Once again, Happy Valentine's Day!

Today I wore the Shown to Scale wiggle dress solo for a little Marilyn Monroe/Bettie Page va va voom.

The gorgeous red rose I sported in my hair I got at Hollie GoFrightly's booth at Rock and Shock last October. It's a horror movie convention in Worcester, Massachusetts. It's so much fun!

Hollie GoFrightly offers pinup and movie-inspired pieces with a little bit of a dark twist. I have a darker red velvet rose from her, as well.

The red plastic heart earrings  I got for Valentine's Day ages ago, and the gold bangle bracelet with a red jewel dangle is from Express, and I've had it since high school.

I was also a bit cheeky with my lip shade today and wore 'Fire and Ice' for the first time. It's a bit lighter than my other reds but still very beautiful and wearable!


Until next time,


Friday, January 24, 2014

Outfit of the Day: Pink Lace and Angora!

Hello, darlings!

This is going to be a weekly feature here on Quaintrelle Mademoiselle, where I show you a peek inside my closet!


--

New Years' week, I was very lucky to receive a most treasured gift from my mother. A baby pink, wool and angora beret that belonged to my great grandmother in the late 1950s! The milliner is Belmar, from Italy.


It sat neatly in its protective box for a while, as I had no idea what to team it with. Until this week.

It's been frigidly cold here in the northeastern United States, so layering has been key. I took a rosy pink lace tank dress from Forever 21, wore nude stockings underneath, and over it a fluffy black jacket from H&M that was a birthday gift last month.


Something was missing from this sweet outfit, though. I picked up the hat and put it with everything else. It was exactly the finishing touch I needed! It fits snugly on my head, and is so Jackie Kennedy.


I also tried out Revlon's Love That Red for the first time, and I do indeed love it! It's got the same creamy formula, and a brilliant red sheen like mid-1940s Lauren Bacall! Adore!


Until next time,